


Step-by-Step: Revamping Anika Black Wood Side Table and Curtis Round End Table
Introduction: Why Flip End Tables?
Choosing to revamp your end tables is a prudent and cost-effective strategy for refreshing your home décor. End tables often serve as focal points in living spaces, drawing attention and setting the tone for the room. As such, updating their look can have a significant impact. In particular, flipping an end table like the Anika Black Wood Side Table or the Curtis Round End Table ensures you are not only keeping up with current design trends but also personalizing your space.
Consider the following reasons why flipping end tables can be highly beneficial for you:
- Cost-Effectiveness: Purchasing new end tables can be expensive, especially if they are of good quality. Revamping existing tables allows you to achieve a fresh look at a fraction of the cost.
- Sustainability: In this era of environmental awareness, recycling or repurposing furniture is a practical choice. Flipping an end table reduces waste and promotes a more eco-friendly lifestyle.
- Customization: When you revamp furniture, you have the opportunity to tailor it exactly to your needs and tastes. Whether you prefer an elegant design or a more rustic feel, personalizing allows for optimal customization.
- Skill Development: Engaging in DIY projects like flipping end tables enhances your skills and creativity. This hands-on experience can be beneficial for future projects and offers a sense of accomplishment.
- Emotional Value: Furniture pieces often hold sentimental value. By choosing to revamp rather than replace, you maintain the emotional ties while giving the item a new lease on life.
Additionally, flipping tables can transform an outdated piece into a stylish and functional component of your home. This process allows you to experiment with various finishes, paints, and hardware to achieve a cohesive look that blends harmoniously with your existing décor.
The Anika Black Wood Side Table and Curtis Round End Table are versatile pieces ideal for such transformations. Their classic designs provide a sturdy foundation for various styles, whether modern, vintage, or eclectic. By taking the time to invest in these transformations, you ensure a perfect blend of aesthetics and functionality in your living spaces.
Flipping end tables is more than a simple revamp. It’s a creative process that contributes to sustainability, personalization, and skill-building—the perfect blend for any modern homeowner.
Understanding the Potential: What Makes Nuevo’s Anika Black Wood Side Table Special
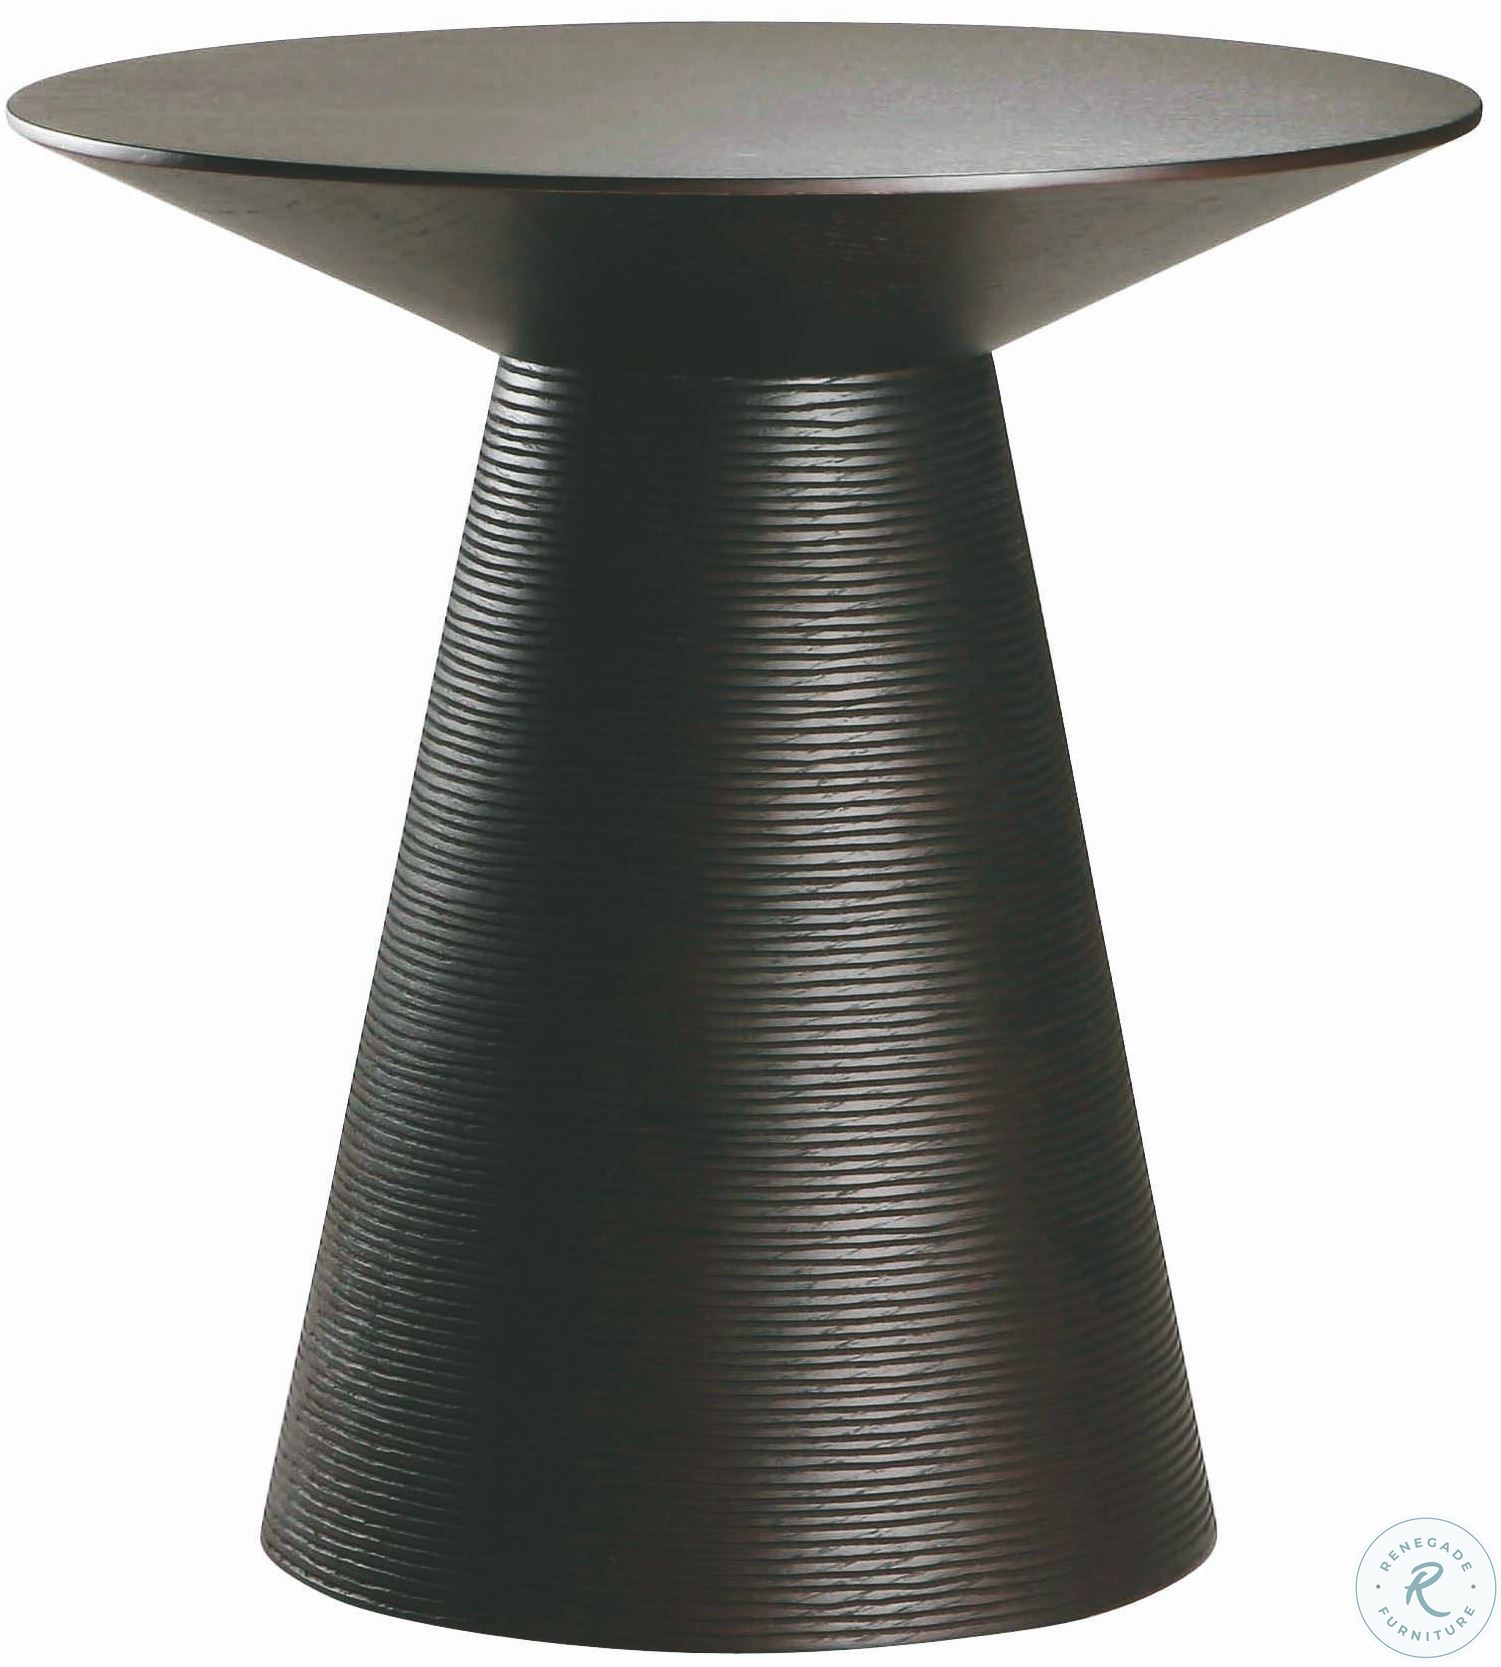
When you come across Nuevo’s Anika Black Wood Side Table, the first thing that captures your attention is its sophistication. This piece of furniture isn’t just a mere table; it’s a statement. Here’s what makes it stand out:
Aesthetic Appeal
- Smooth Finish: The black wood boasts a striking finish that blends seamlessly with various interior design themes, from modern to minimalist.
- Clean Lines: The simplicity of its design, with clean, straight lines, provides a timeless look that enhances any room’s elegance.
Material Quality
- Solid Wood Construction: Crafted from high-quality wood, the table ensures durability and longevity. It’s not just about looks; it’s built to last.
- Sustainable Sourcing: The wood used is sustainably sourced, meaning you can take pride in owning a piece that’s environmentally responsible.
Functional Design
- Compact Size: Its size makes it an ideal choice for spaces like small apartments or cozy corners. It offers usefulness without overwhelming the room.
- Versatility: This side table isn’t limited to just holding a lamp. It’s versatile enough to function as a nightstand, end table, or standalone piece in a hallway.
Unique Features
- Textural Beauty: The texture of the wood grain adds a tactile dimension that you can both see and feel, adding depth to its visual appeal.
- Subtle Accents: Small details, such as slightly beveled edges or discrete joinery, show the craftsmanship involved in its construction.
Practicality
- Easy Maintenance: Its finish allows for easy cleaning and maintenance, making it a practical choice for busy households.
- Lightweight: Despite its solid wood construction, the table is relatively lightweight, making it easy to move and position as needed.
Emotional Connection
- Designer Piece: Owning a Nuevo piece isn’t just about furniture; it’s about investing in design heritage and makers’ passion.
- Customization: The simplicity of the design allows you to easily pair it with various decorative items, making it a versatile backdrop for displaying personal treasures.
By focusing on these attributes, you gain insight into why the Nuevo’s Anika Black Wood Side Table isn’t just another table but a thoughtful addition to your living space.
Necessary Tools and Materials for Your Transformation Project
To successfully revamp your Anika Black Wood Side Table and Curtis Round End Table, you need to gather a range of tools and materials. Proper preparation ensures a smooth and efficient transformation process.
Tools You’ll Need:
- Screwdriver Set: A comprehensive set with both flathead and Phillips screwdrivers for assembly and disassembly.
- Electric Sander: To smoothen the surface of the tables, making them ready for painting or staining.
- Detail Sander or Sanding Sponges: For tight or intricate spots that the electric sander can’t reach.
- Paint Brushes and Rollers: Various sizes for different parts of the tables, ensuring even coverage.
- Painter’s Tape: To protect areas you do not want to paint.
- Drop Cloths or Plastic Sheeting: To protect your working area from dust and paint spills.
- Safety Gear: Goggles, gloves, and dust masks to safeguard yourself during sanding and painting.
Materials You’ll Need:
- Sandpaper: Different grits (80, 120, 220) for initial sanding, smoothing, and fine finishing.
- Wood Filler: For filling any dents or holes before sanding.
- Primer: To ensure a good base for the paint to adhere to.
- Paint or Stain: Choose based on your desired finish. Consider colors or wood tones.
- Clear Coat or Sealant: To protect the finished tables from wear and tear.
- Wood Glue: For repairing any loose joints or broken pieces.
- Hardware: Replacement screws, bolts, or handles if you plan to update hardware elements.
- Clean Cloths or Rags: For wiping down surfaces during the preparation and finishing stages.
Additional Items for a Professional Finish:
- Tack Cloths: To remove dust particles post-sanding.
- Paint Trays and Liners: For efficient and clean paint application.
- Stir Sticks: For thoroughly mixing paint or stain before use.
- Plastic Wrap: To wrap brushes and rollers if you need to pause your painting for a short break.
Having these tools and materials on hand will ensure you’re fully prepared to begin your project. Happy revamping!
Preparing Your Workspace for a Seamless Transformation
To ensure a streamlined and effective refurbishing process for your Anika Black Wood Side Table and Curtis Round End Table, careful preparation of your workspace is crucial.
Selecting the Optimal Location
Identify a well-ventilated area with adequate lighting to assess your projects effectively. A garage, outdoor space, or a spacious, ventilated room would be ideal choices.
Assembling Necessary Tools and Materials
Gather all essential tools and materials before commencing your project. This will save time and prevent interruptions. You will need:
- Sandpaper (various grits)
- Paint scrapers
- Paint brushes/rollers
- Primer
- Paint or wood stain
- Sealant
- Drop cloths or tarps
- Safety gear (goggles, mask, gloves)
Ensuring Surface Protection
Protecting both your furniture and workspace is imperative. Follow these steps:
- Cover the floor with a drop cloth or tarp to catch any spills or debris.
- Position your furniture on top of the protected area.
- Consider using painter’s tape on any areas of the furniture that should not be painted or sanded.
Cleaning and Prepping Furniture
Proper cleaning and prepping are fundamental for successful transformation. Ensure to:
- Clean Surfaces: Use a mild detergent and water solution to eliminate dirt, grease, and grime from the tables.
- Inspect for Damage: Thoroughly examine for any nicks, scratches, or loose parts that may need attention.
- Make Repairs: Fill any dents or scratches with wood filler, allowing it to dry according to the manufacturer’s instructions.
Organizing Your Workflow
Create a systematic workflow to enhance productivity:
- Step 1: Sand the furniture to remove old finish or paint.
- Step 2: Apply primer to ensure a solid base for the new finish.
- Step 3: Paint or stain the furniture to your desired color and finish.
- Step 4: Apply sealant to protect your hard work and provide durability.
Safety Considerations
Adherence to safety protocols will protect you from potential risks:
- Ventilation: Ensure your workspace has sufficient ventilation to avoid inhaling fumes.
- Protective Gear: Wear goggles, gloves, and a mask to shield yourself from dust and chemicals.
- First Aid: Have a first aid kit on hand for any minor injuries that might occur.
By meticulously preparing your workspace with these methods, you position yourself for a seamless and successful furniture transformation.
Initial Steps: Cleaning and Sanding the Table
To begin your revamping project on the Anika Black Wood Side Table and Curtis Round End Table, start with a thorough cleaning process. This ensures the surfaces are free from dirt, grease, and other residues that could affect the sanding and painting stages.
- Gather Supplies:
- Mild dish soap or wood cleaner
- Soft cloth or sponge
- Bucket of warm water
- Protective gloves
- Fine-grit sandpaper (120- to 220-grit)
- Sanding block or electric sander
- Tack cloth
- Initial Cleaning:
- Mix the mild dish soap or wood cleaner with warm water in a bucket.
- Dip a soft cloth or sponge into the solution, wring it out, and wipe down the entire table surface. Pay extra attention to spots with visible grime or stains.
- Rinse the cloth or sponge frequently in the clean water to avoid spreading dirt.
- Drying:
- Allow the table to dry completely before moving on to sanding. This can take several hours, depending on the room’s humidity.
- Sanding Preparation:
- Before sanding, inspect the table for any dents or deep scratches. Fill these areas with wood filler if necessary and allow them to dry according to the manufacturer’s instructions.
- Remove any hardware like drawer pulls or handles to avoid damaging them during sanding.
- Sanding Process:
- Begin with medium-grit sandpaper (120-grit) for initial smoothing. If using an electric sander, ensure you go with the grain of the wood to avoid cross-grain scratches.
- Progress to fine-grit sandpaper (220-grit) to achieve a smoother finish. Sand all surfaces, including legs and any intricate details, maintaining a consistent pressure.
- For hard-to-reach areas, use a sanding sponge or manually wrap sandpaper around a small block for better control.
- Cleaning Post-Sanding:
- Use a tack cloth to wipe down the table thoroughly, removing all sanding dust. Any residual dust can interfere with paint or stain adhesion.
Maintaining a dust-free work environment is essential to ensure a flawless finish. Consider using a vacuum cleaner with a brush attachment if necessary.
These steps prepare your Anika Black Wood Side Table and Curtis Round End Table for the next stage, unlocking new potential in their appearance and functionality.
Choosing the Right Paint and Finish for a Stunning Outcome
When selecting paint and finish for your Anika Black Wood Side Table and Curtis Round End Table, you must consider the wood type, room decor, and expected wear and tear. Your choice will significantly impact the final appearance and longevity of your furniture.
First, you need to consider the type of paint suitable for your project. Here are some options:
- Water-Based Paint:
- Pros: Quick drying, easy to clean, less odor.
- Cons: May require more coats for complete coverage.
- Oil-Based Paint:
- Pros: Durable, smooth finish.
- Cons: Longer drying time, strong odor, requires solvents for cleanup.
- Chalk Paint:
- Pros: Offers a matte finish, easy to distress, minimal prep work.
- Cons: Requires a protective wax or lacquer to seal.
Next, focus on the finish. Different finishes serve varied purposes and affect the final look:
- Matte Finish: No shine, ideal for a rustic or vintage appearance.
- Eggshell Finish: Low sheen, subtle glow, easier to clean than matte.
- Satin Finish: Slight sheen, durable, good for high-traffic areas.
- Gloss Finish: Highly reflective, offers a modern look, easiest to clean.
For a professional result, follow these steps:
- Preparation:
- Sand the table to remove the old finish and ensure smooth surfaces.
- Clean the table thoroughly to remove any dust or debris.
- Priming:
- Apply primer to create a uniform base and enhance paint adhesion.
- Allow the primer to dry completely before proceeding.
- Painting:
- Use quality brushes or rollers for even application.
- Apply multiple thin coats, allowing each to dry fully before adding the next.
- Finishing:
- Apply the chosen finish to protect the paint and add aesthetic appeal.
- For maximum durability, consider applying a clear topcoat.
By following these guidelines, you can achieve a professional, long-lasting, and visually pleasing transformation for your Anika Black Wood Side Table and Curtis Round End Table.
Applying Paint: Tips for an Even and Flawless Coat
Achieving a smooth and professional finish on your Anika Black Wood Side Table and Curtis Round End Table requires meticulous paint application techniques. Follow these expert tips to ensure an even, flawless coat every time.
1. Prepare Your Surface
Proper surface preparation is essential for a lasting paint job.
- Sand Thoroughly: Use fine-grit sandpaper to smooth out any imperfections. Wipe the tables clean with a tack cloth to remove dust.
- Prime: Apply a high-quality primer to the tables. This step ensures better adhesion and enhances the durability of the paint.
2. Choose the Right Tools
Selecting appropriate tools can make a significant difference.
- Brushes: Use synthetic bristle brushes for water-based paints and natural bristle brushes for oil-based paints.
- Rollers: Mini foam rollers are ideal for larger, flat surfaces as they create a more uniform finish.
3. Paint Application Technique
The method of application affects the finish quality greatly.
- First Coat: Apply the first coat lightly. Don’t overload your brush or roller with paint.
- Direction: Paint in the direction of the wood grain to prevent streaks.
- Edge Handling: Use an angled brush for edges and intricate areas to maintain clean lines.
4. Layering and Dry Time
Patience is crucial for a perfect finish.
- Dry Between Coats: Allow each coat to dry completely before applying the next. Check the paint can for specific drying times.
- Second Coat: Apply a second, thicker coat to achieve full coverage. Follow the same brush or roller technique as the first coat.
5. Final Touches
Finishing touches can elevate the quality of your project.
- Inspect: After the final coat dries, inspect the surface in good lighting.
- Touch-up: Lightly sand any rough spots and apply touch-up paint where needed.
By adhering to these guidelines, you ensure that your Anika Black Wood Side Table and Curtis Round End Table not only look aesthetically pleasing but also retain their pristine condition over time.
Adding Unique Features: Stencils, Decoupage, and More
Incorporating unique features into the Anika Black Wood Side Table and Curtis Round End Table can elevate their aesthetic appeal. There are several techniques to consider, including stencils, decoupage, and other methods. Each method requires specific tools and a step-by-step approach to ensure professional results.
Stencils
- Choose Your Design: Select a pattern that complements your existing decor.
- Geometric shapes for a modern look
- Floral patterns for a vintage feel
- Prepare the Surface: Clean the table to remove dust and debris.
- Position the Stencil: Use painter’s tape to hold the stencil in place securely.
- Apply Paint:
- Use a stencil brush or sponge
- Apply paint lightly to avoid bleeding
- Remove Stencil Carefully: Allow the paint to dry partially before removing the stencil to prevent smudging.
Decoupage
- Select Your Paper: Choose decorative paper, napkins, or fabric.
- Consider prints that match your room’s theme.
- Cut to Size: Measure and cut the paper to fit the table’s surface.
- Apply Adhesive: Use decoupage glue and brush it onto the table.
- Place the Paper: Smooth the paper onto the adhesive, removing air bubbles.
- Seal the Surface: Apply several layers of decoupage glue over the paper for a durable finish.
Additional Techniques
- Gilding:
- Apply a base adhesive
- Press gold or silver leaf sheets onto the surfaces
- Seal with a clear topcoat
- Inlay Work:
- Cut or purchase inlay pieces
- Embed them into a pre-routed groove
Finishing Touches
- Final Sealant: Use a polyurethane or wax finish to protect the added features.
- Hardware Updates: Replace existing handles or knobs with unique, artisan-crafted pieces.
Finally, each addition enhances your side or end tables creating a customized piece that radiates individual style and sophistication.
Installing New Hardware: Knobs, Pulls, and Legs
When it comes to revamping the Anika Black Wood Side Table and Curtis Round End Table, installing new hardware can significantly elevate the overall aesthetic. Follow these instructions to ensure a smooth and professional transformation.
Tools and Materials Needed
- New knobs and pulls
- New table legs (if applicable)
- Screwdriver (flathead or Phillips, depending on screw type)
- Drill and appropriate drill bits
- Measuring tape or ruler
- Pencil
- Level
Step-by-Step Procedures
1. Removing Old Hardware
- Knobs and Pulls:
- Use a screwdriver to loosen the screws holding the old knobs or pulls in place.
- Carefully remove the old hardware while ensuring not to damage the wood surface.
- Set aside screws for potential reuse or disposal.
- Table Legs:
- Flip the table upside down on a soft surface to avoid scratches.
- Unscrew and remove the existing legs using a screwdriver or wrench.
2. Measuring and Marking
- For Knobs and Pulls:
- Measure the distance between screw holes if the new hardware doesn’t match the old holes.
- Use a pencil to mark the exact spots for new holes.
- For Table Legs:
- Measure and mark the placement of each leg to ensure they are evenly spaced.
3. Drilling New Holes
- Select a drill bit that matches the size of the screws provided with the new hardware.
- Carefully drill the holes where you’ve marked. Use a level to ensure alignment.
4. Installing New Hardware
- Knobs and Pulls:
- Align the new hardware with the holes you’ve drilled.
- Insert the screws through the back and tighten them using a screwdriver.
- Ensure the hardware is firmly secured but avoid overtightening.
- Table Legs:
- Position the new legs into place.
- Secure the legs using screws or bolts provided.
- Ensure all legs are tightened equally to prevent wobbling.
Final Adjustments
- After the new hardware is installed, check the alignment.
- Adjust any misalignments as needed.
- Wipe down the table to remove any markings or debris from drilling.
By following these steps, you will successfully install new hardware on your Anika Black Wood Side Table and Curtis Round End Table, ensuring both functionality and style.
Final Touches: Sealing and Protecting Your Masterpiece
After you have finished painting and allowed adequate drying time, it is essential to seal and protect your Anika Black Wood Side Table and Curtis Round End Table. This step not only enhances the durability of the furniture but also maintains the aesthetics of your hard work.
- Selecting the Right Sealant:
- Choose a sealant suitable for your furniture’s finish. For painted surfaces, a clear polyurethane or polycrylic sealant works well. For stained surfaces, consider a stain-friendly varnish or lacquer.
- Ensure the sealant is appropriate for indoor furniture to avoid unnecessary exposure to harsh chemicals.
- Preparing the Surface:
- Lightly sand the painted or stained surface with a fine-grit sandpaper. This helps the sealant adhere better.
- Clean off any sanding dust using a tack cloth or a damp microfiber cloth to leave the surface smooth and dust-free.
- Applying the Sealant:
- Stir the sealant gently before use to avoid air bubbles.
- Apply a thin, even coat using a high-quality brush or a foam applicator. Work in sections to ensure uniform coverage.
- Follow the wood grain direction for a professional finish. Avoid over-brushing; a few light strokes are enough.
- Drying Time and Additional Coats:
- Allow the first coat to dry according to the manufacturer’s instructions, usually around 2-4 hours.
- After drying, lightly sand the surface again with fine-grit sandpaper to remove any imperfections.
- Wipe away the dust and apply subsequent coats. Typically, 2-3 coats are recommended for optimal protection, with adequate drying time between each coat.
- Final Inspection and Maintenance:
- Inspect your table for any spots that might need a touch-up.
- Ensure the final coat is thoroughly dry before placing any objects on the table.
- Periodically check the table and reapply sealant as needed to keep it looking fresh and protected.
By carefully following these steps, you will ensure your Anika Black Wood Side Table and Curtis Round End Table are not only beautiful but also well-protected against daily wear and tear.
Styling and Placing Your Transformed Table in Your Home
Styling your newly revamped Anika Black Wood Side Table and Curtis Round End Table involves a keen eye for detail to enhance your home’s aesthetic. Follow these key guidelines to ensure your tables not only complement but also augment your space.
Choosing the Right Location
- Living Room:
- Set the Mood: Position the side tables near sofas or armchairs. This not only offers convenience but also adds a focal point to your seating area.
- Lighting: Place a stylish table lamp on your transformed table to enhance the ambiance. Soft lighting can create a cozy and inviting atmosphere.
- Bedroom:
- Bedside Elegance: Use your Anika Table as a nightstand, perfect for holding a lamp, alarm clock, or your favorite bedtime book.
- Symmetry: Consider placing a table on each side of the bed for a balanced look, especially if you have two matching revamped tables.
- Entrance Hall:
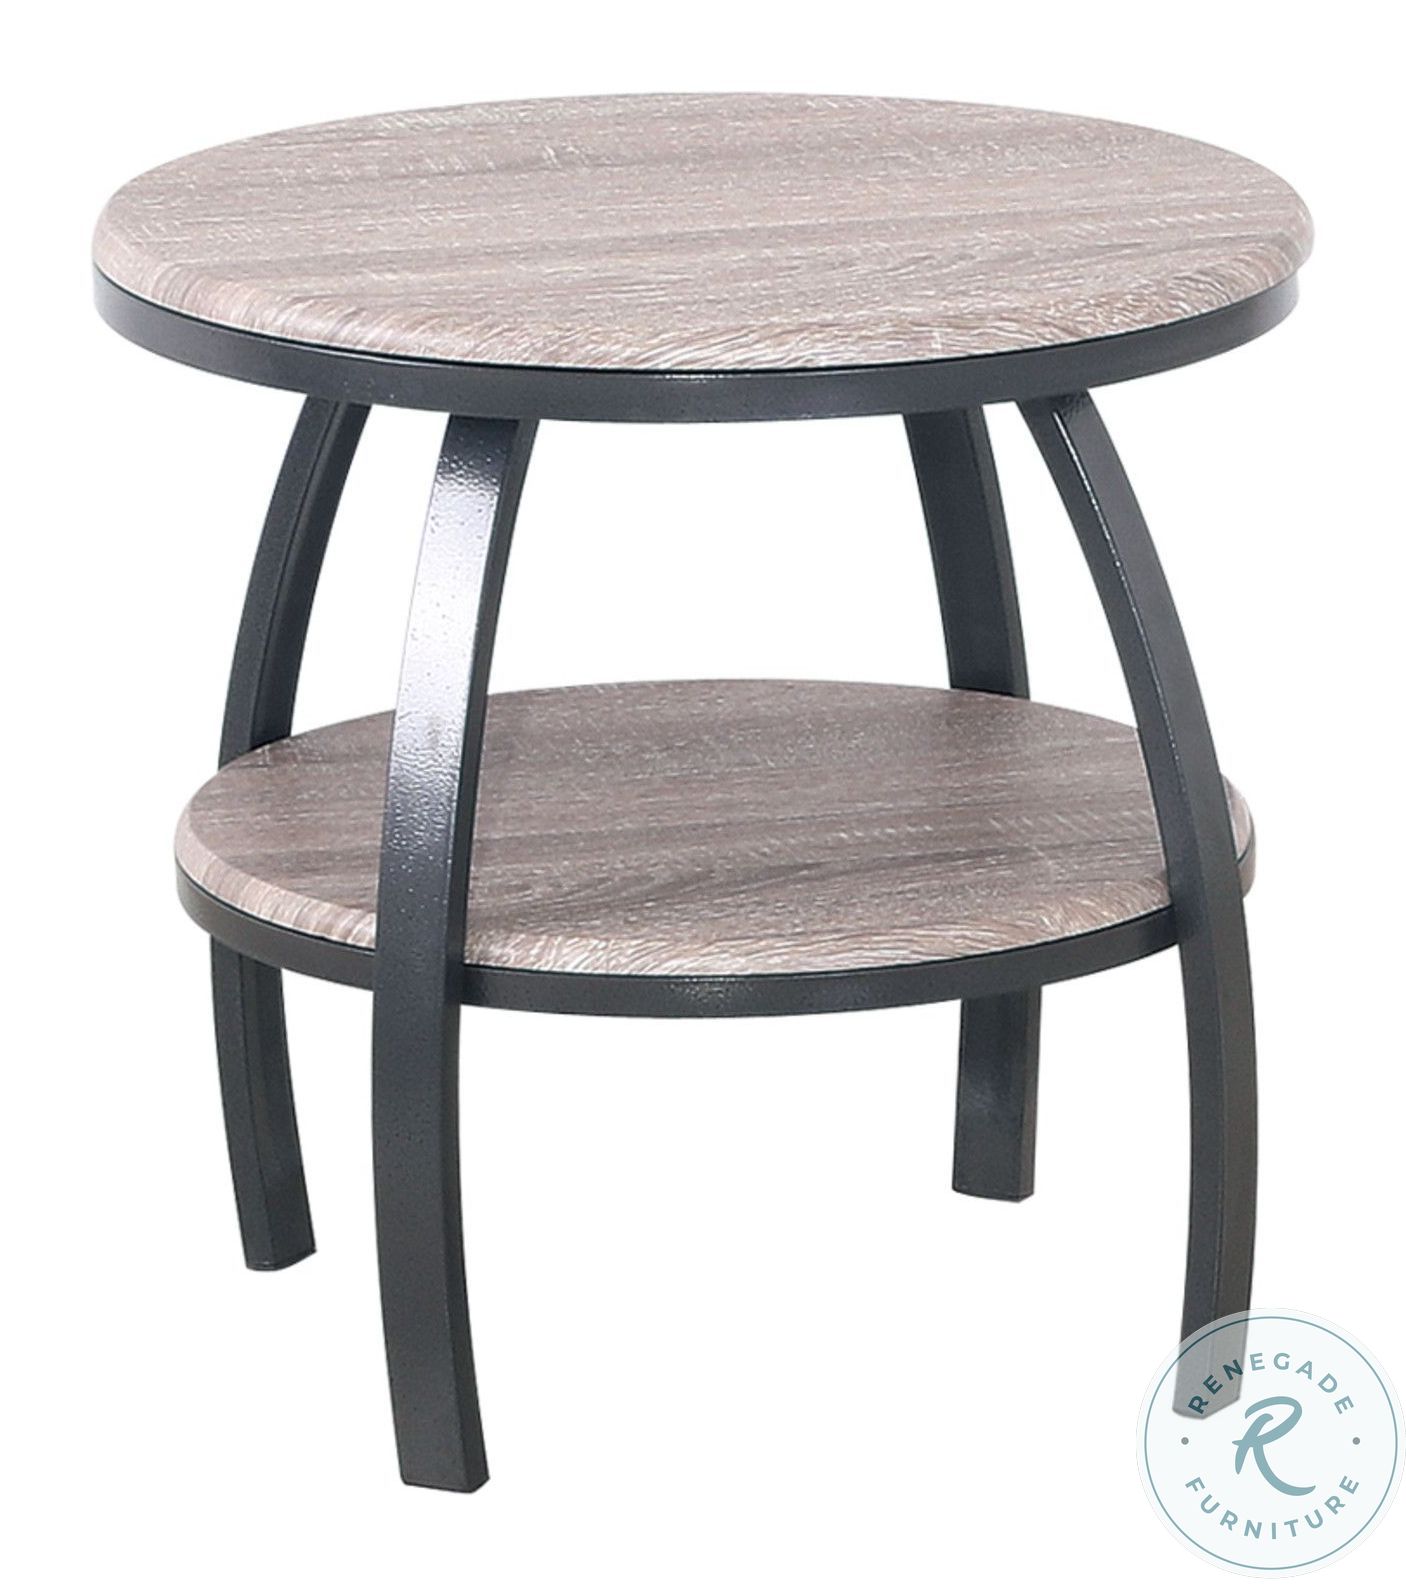
- First Impressions: Position the Curtis Round End Table near your entrance to hold decorative items such as vases, candlesticks, or a stylish tray for keys and mail.
Decor Tips
- Greenery and Florals: Add a touch of nature with a small potted plant or a fresh floral arrangement. This can provide a pop of color and bring life to the table.
- Books: Stack a few books to add intellectual charm. Choose volumes with attractive covers that tie into your room’s color scheme.
- Decorative Objects: Select pieces that reflect your personal style. You might include a vintage clock, photo frames, or unique sculptures.
Consider Proportion and Scale
- Balance: Ensure the items you place on the tables do not overwhelm them. For instance, a large lamp may overpower a small table. Aim for proportionality to maintain visual harmony.
- Height Variation: Use objects of different heights to create a dynamic arrangement. A taller lamp paired with shorter decorative items can provide visual interest.
Color Coordination
- Complementary Hues: Choose decor items in colors that either complement or contrast pleasingly with the finish of your tables.
- Cohesive Palette: Ensure color themes throughout your room are echoed in the accessories you place on the table. This cohesion can tie the room together seamlessly.
By thoughtfully styling and strategically placing your revamped tables, you can transform them into functional art pieces, enhancing your home’s overall decor. Apply these guidelines to achieve a professionally curated look.
Tips for Maintaining Your Newly Flipped End Table
Maintaining your newly revamped end table ensures its longevity and keeps it looking fresh and stylish. Here are essential tips to follow:
Regular Cleaning
- Dust Frequently: Use a soft, dry cloth to remove dust weekly. Avoid using abrasive materials that may scratch the surface.
- Gentle Cleaning Solutions: Use a mild soap-water mixture for cleaning. Dampen a cloth, wipe down the table, and dry thoroughly.
- Avoid Excess Moisture: Water can damage wood and finishes. Always use a damp, not wet, cloth when cleaning.
Protecting the Surface
- Use Coasters and Placemats: Prevent rings and stains from drinks and food by placing coasters and placemats on the table.
- Avoid Direct Sunlight: Continuous exposure to direct sunlight can fade the wood finish. Place your table away from windows or use curtains to block direct sun.
- Heat Protection: Avoid placing hot items directly on the table. Use trivet stands or heat-resistant mats for protection.
Preventing Damage
- Handle with Care: Be mindful when moving the table. Lift rather than drag it to prevent leg and surface damage.
- Stable Placement: Ensure the table is on an even surface to avoid wobbling, which can weaken the joints.
- Routine Checks: Regularly check for loose screws or hardware. Tighten them promptly to maintain stability and integrity.
Refinishing and Touch-ups
- Touch-up Scratches: Use a wood touch-up pen for minor scratches. Match the color closely to the table’s finish for a professional look.
- Periodic Re-Polishing: Depending on usage, consider re-polishing the table every 6-12 months to maintain its sheen and protection.
- Professional Refinishing: For more significant wear, consult a professional to refinish the table, ensuring it retains its original charm.
Humidity and Temperature Control
- Stable Environment: Wood furniture benefits from a stable environment. Maintain consistent humidity and temperature to prevent warping and cracking.
- Dehumidifiers/Humidifiers: Use these tools as needed, especially in extreme weather conditions, to balance the indoor atmosphere.
By implementing these maintenance tips, you can keep your end table looking beautiful and functional for years to come.
Conclusion: Reflecting on the Transformation Journey
Reflecting on the transformation journey of the Anika Black Wood Side Table and the Curtis Round End Table, you likely observed both challenges and rewards. Each step you undertook contributed significantly to the overall aesthetic and functional enhancements of your furniture pieces.
Learning Experiences
- Skills Development: Throughout this process, you probably honed a variety of skills.
- Wood sanding and surface preparation
- Application techniques for paints and stains
- Understanding of wood types and finishes
- Problem-Solving: The restoration offered real-time problem-solving opportunities.
- Addressing imperfections in the wood
- Selecting the right materials to achieve desired outcomes
Aesthetic and Functional Upgrades
- Visual Appeal: The tables now possess a refreshed look.
- Anika table showcases an updated, contemporary design
- Curtis table embodies both elegance and charm
- Enhanced Utility: The modifications have likely increased the tables’ functionality.
- Additional protective coatings on surfaces
- Repair and stabilization of any structural issues
Challenges Encountered
- Time Management: Each phase required careful planning and time allocation.
- Waiting for drying between coats of paint or varnish
- Scheduling multiple sessions for complex tasks
- Material Selection: Choosing the correct materials was pivotal.
- Appropriate grits of sandpaper for different stages
- High-quality paints, stains, and sealants for durability
Achievements Celebrated
- Accomplishments: Reflect on the sense of achievement you likely felt.
- Successfully restoring and revamping two unique pieces
- Witnessing the transformation from old and worn to rejuvenated and stylish
Future Projects
- Inspired Endeavors: The knowledge and confidence you gained are invaluable.”This project has opened a new realm of potential DIY furniture makeovers for you.”
- Exploring further restoration projects
- Possibly assisting others with similar transformation endeavors
Your dedication and effort in this detailed undertaking have not only rejuvenated two individual pieces of furniture but also enriched your skillset and opened new avenues for creative expression in furniture restoration.


